If you’re renovating a historic home in New Orleans, the process can feel overwhelming. You have a vision for your home, a budget in mind, and maybe a Pinterest board full of ideas. But how do you get from that starting point to a finished renovation? And what exactly is an architect doing while all of that is happening?
At Adamick Architecture, we work on historic renovations, new construction, and interior projects across New Orleans. For us, the process matters just as much as the finished product. To show how it all comes together, we use a real project on Napoleon Avenue as a case study in our client workbook. The project follows a traditional New Orleans sidehall shotgun from early documentation through design, permitting, and construction.
Here is what the process actually looks like:
Phase 1: Pre-Design
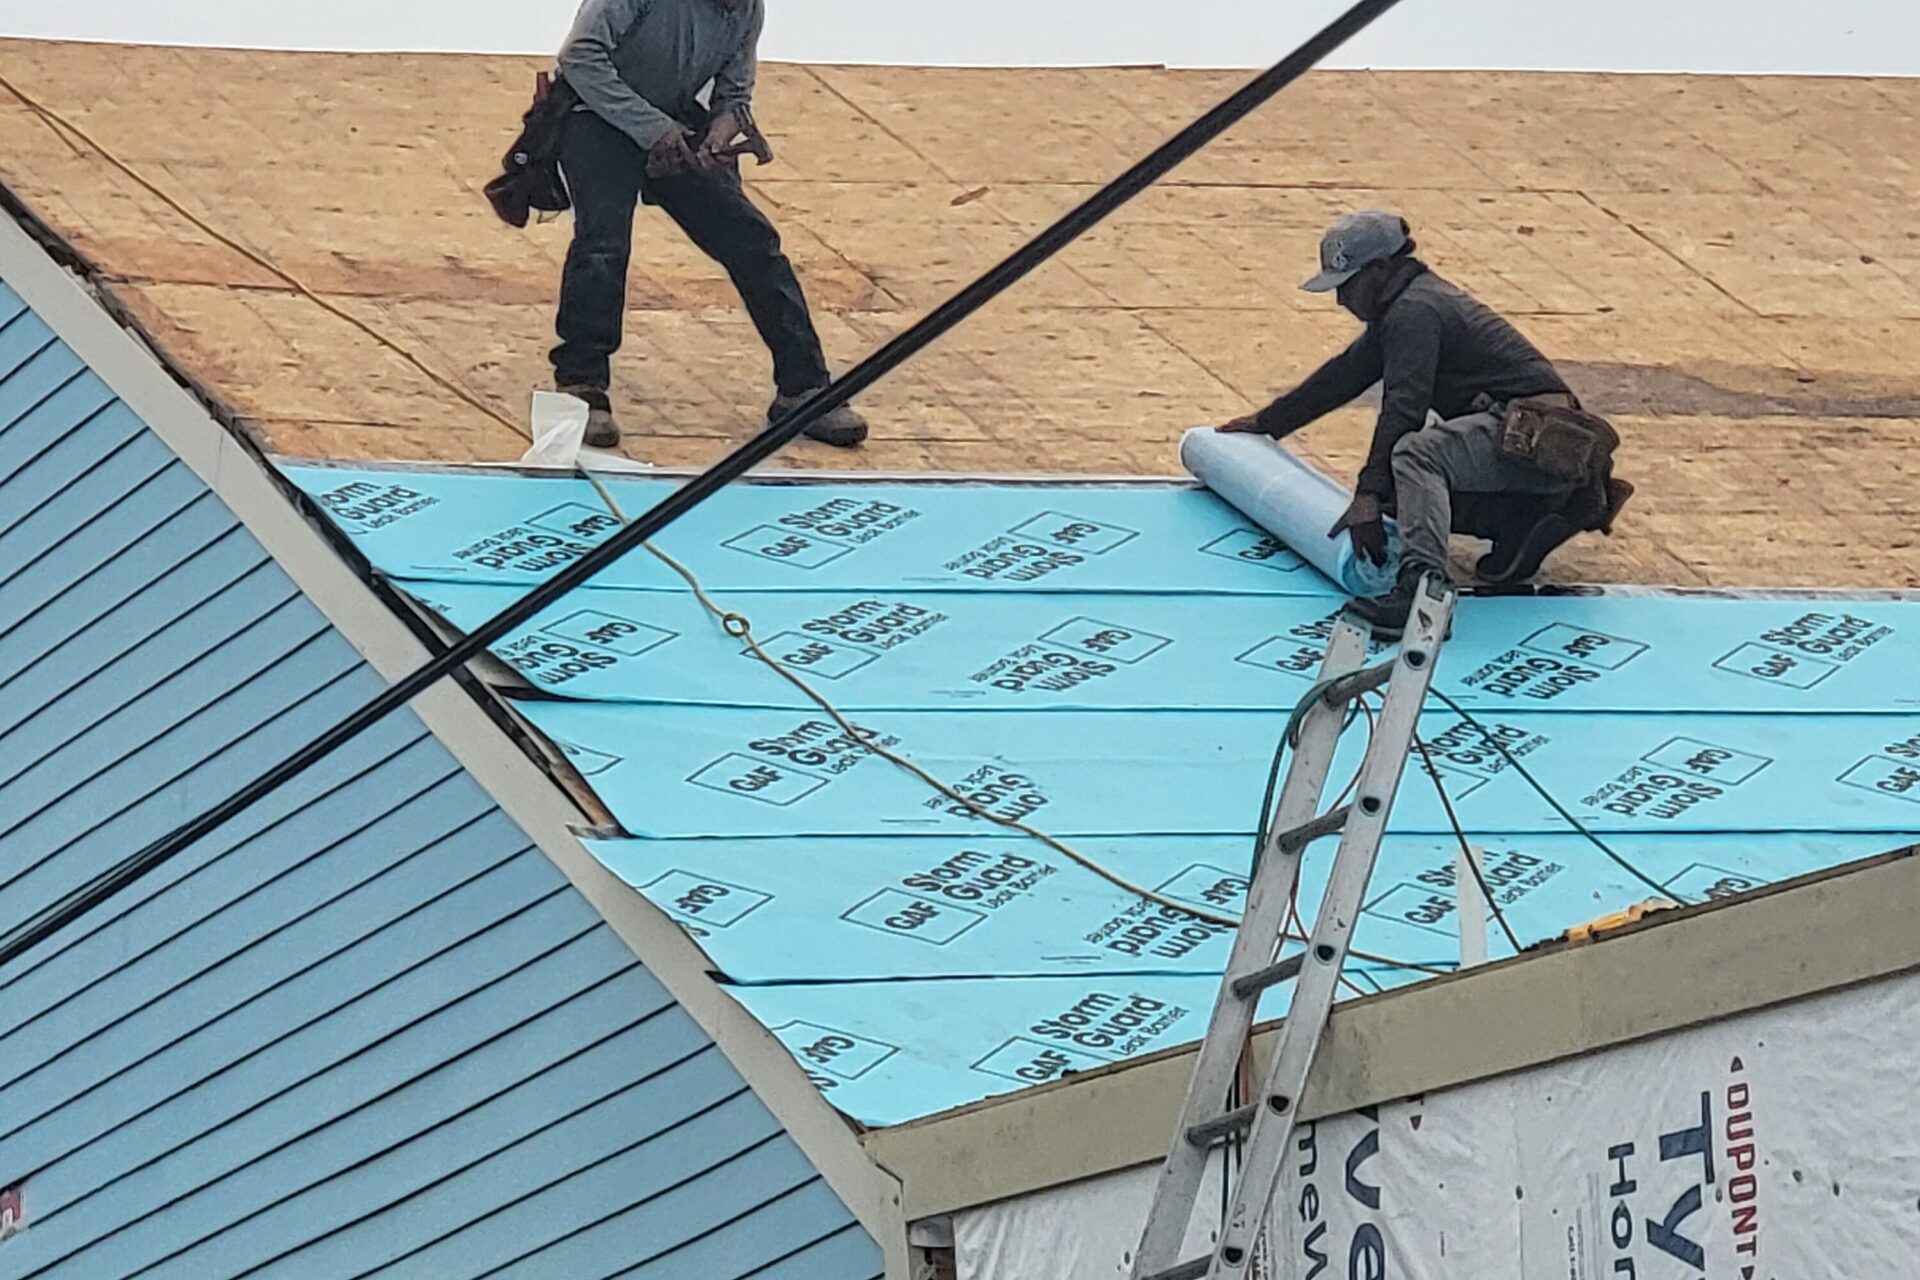
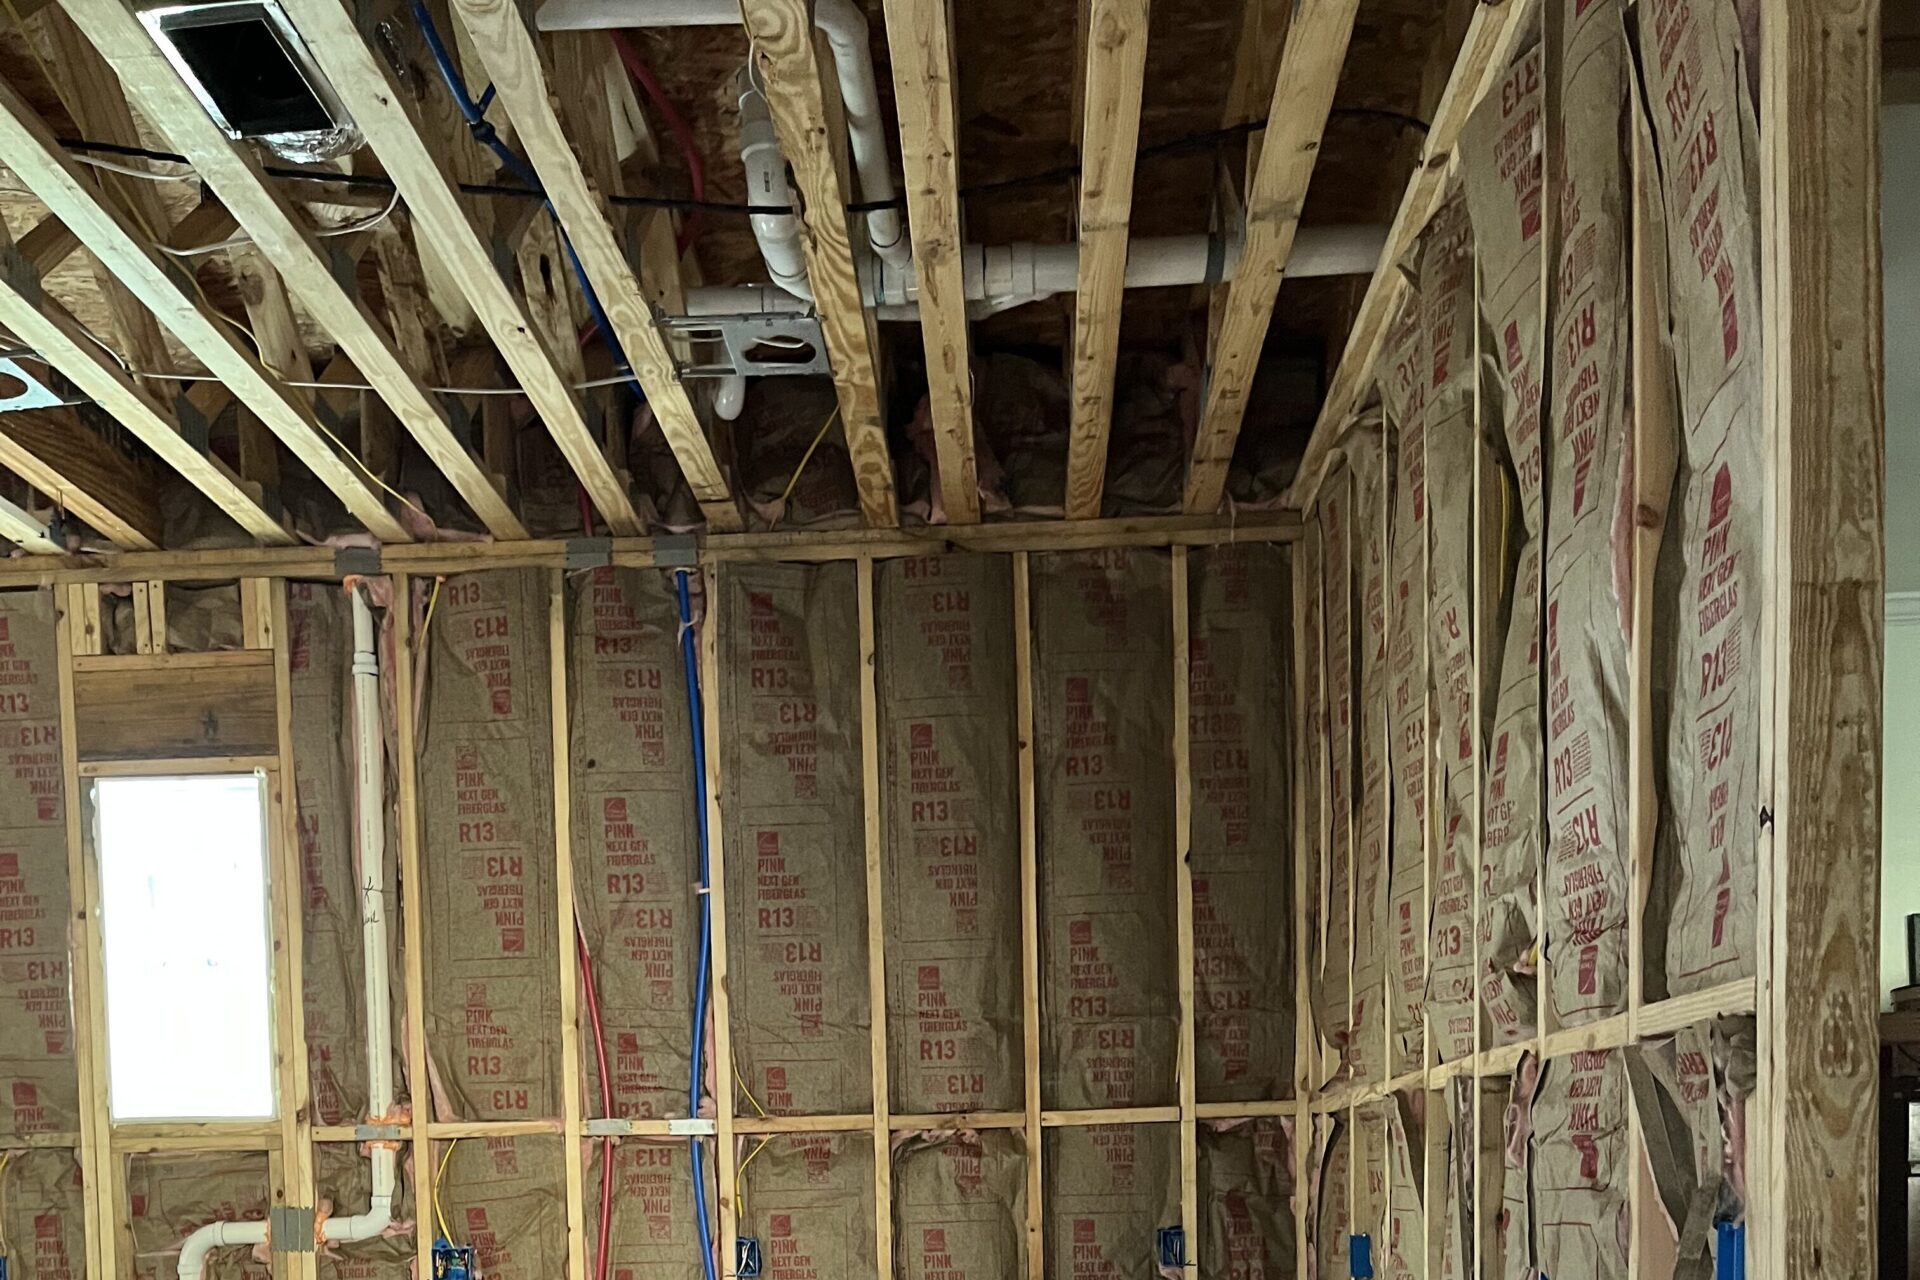
Every renovation begins with documentation.
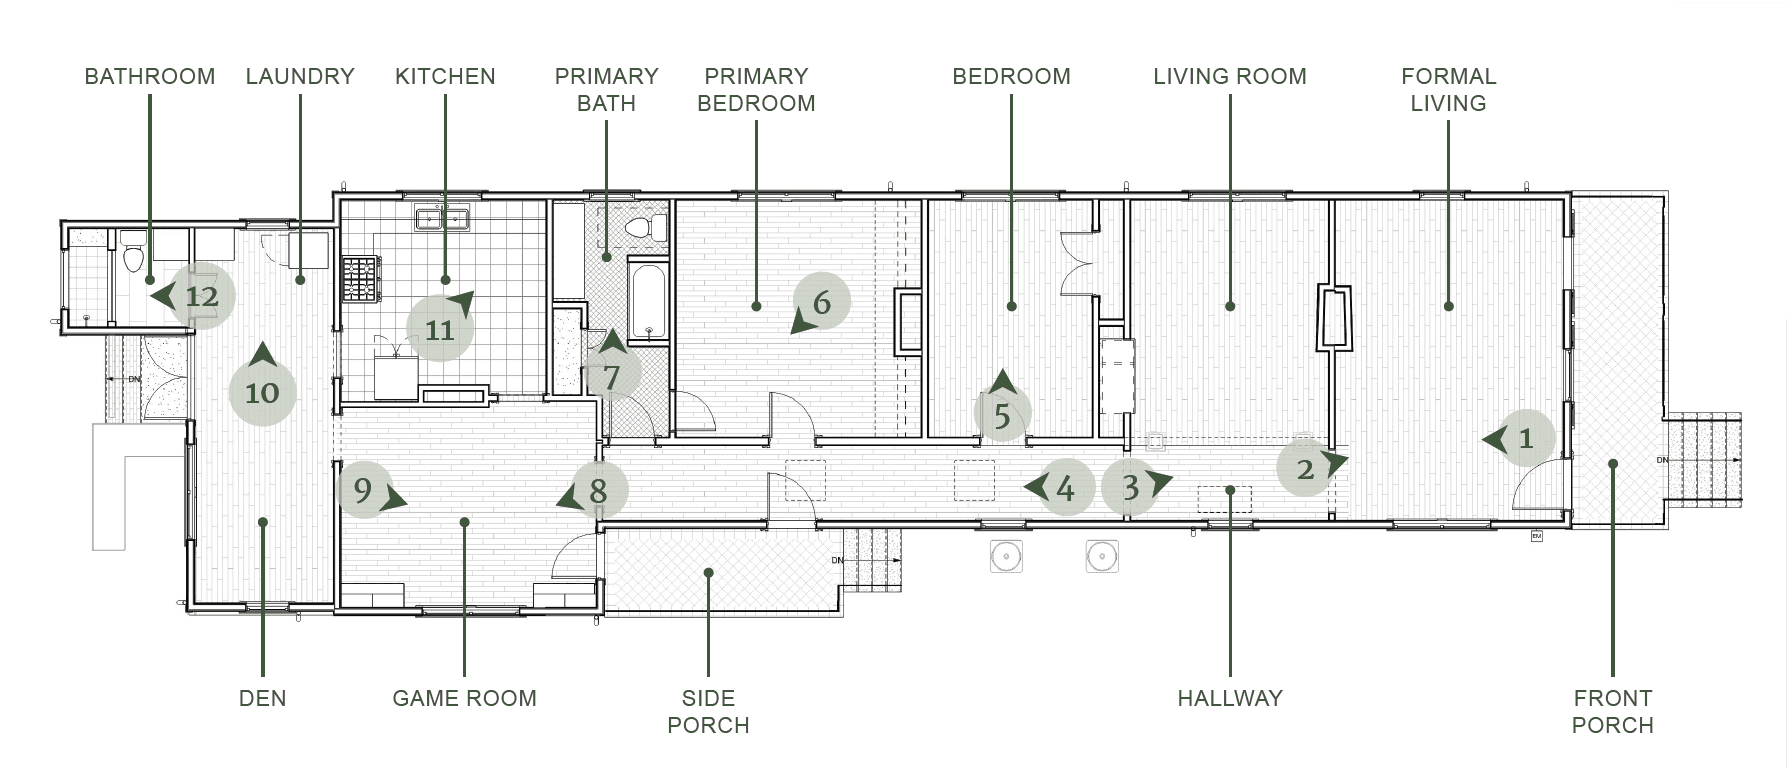
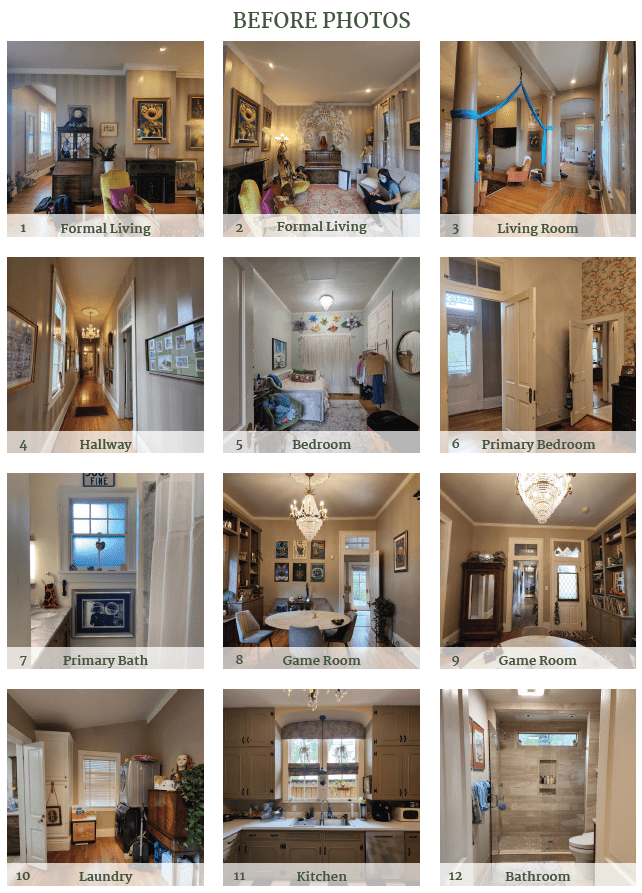
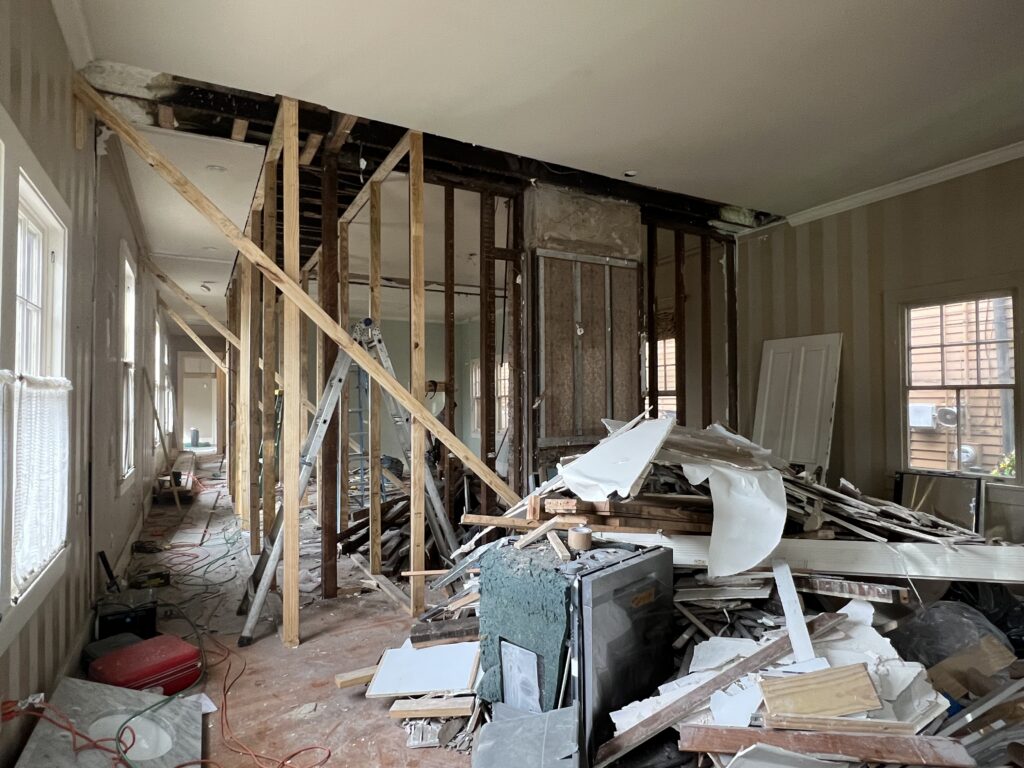
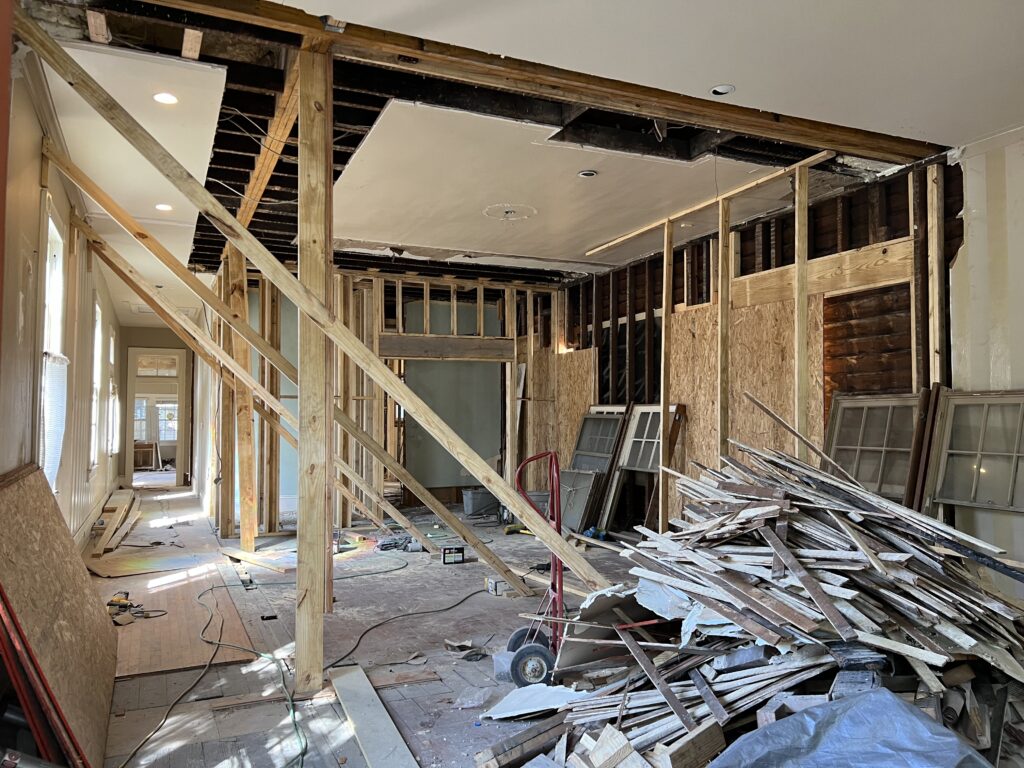
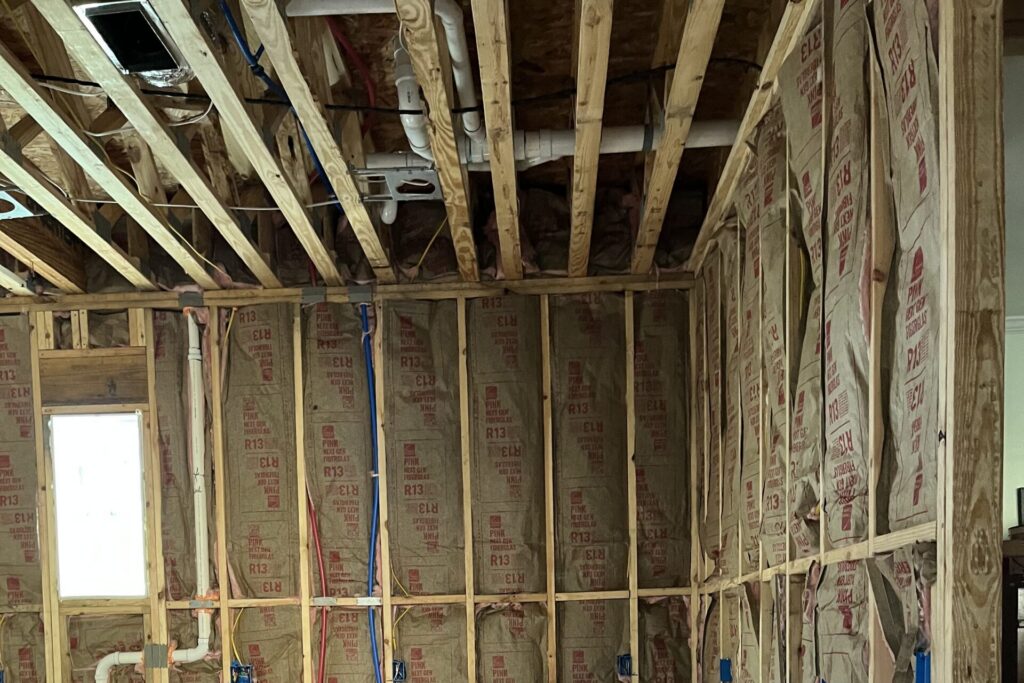
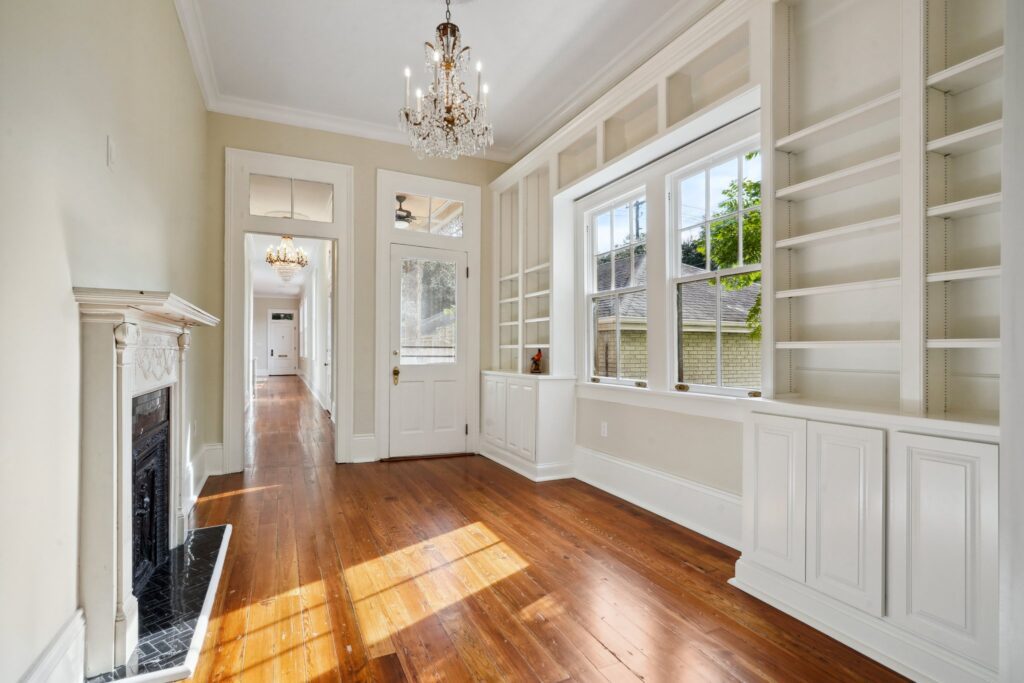
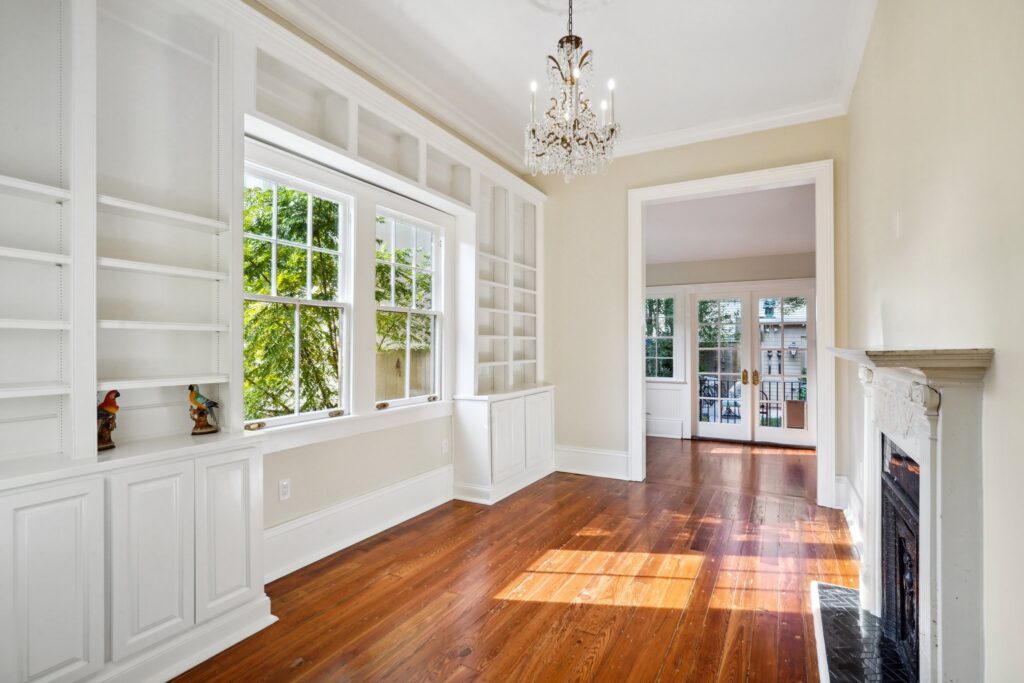
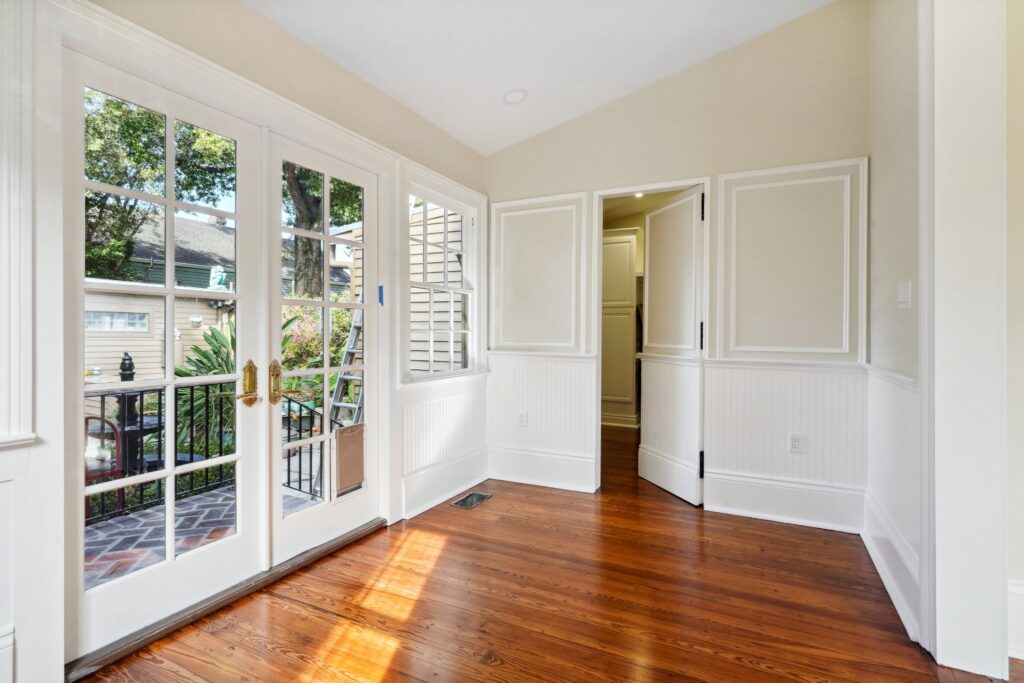
Before any design work begins, we need to understand what we are working with. That means coming to the property, taking detailed photos and measurements, and documenting everything: wall locations, ceiling heights, window and door openings, structural elements, any character-defining details, etc. For historic homes especially, this step is crucial.

While measuring on site, we start building a 3D model of the existing conditions in a program called Revit. That model becomes the foundation for everything that follows, giving us a clear picture of the home as it exists today. We also research zoning codes, flood requirements, and any historic district regulations at this stage.
In our Napoleon Avenue case study, the existing house was divided into a series of small, compartmentalized rooms. The kitchen sat at the back of the house, the living spaces at the front, making entertaining difficult. The clients wanted to open everything up while keeping the scale and character of the historic three-bay sidehall shotgun intact. Pre-Design gave us the full picture of what we were dealing with before we started making any design decisions.
Phase 2: Schematic Design
This is where ideas take shape.
Using the pre-design model and the information gathered from our initial consultation, we develop multiple floor plan concepts that respond to your priorities and long term goals. Not one option. Multiple. Because the right answer isn’t always obvious at the start, and seeing different approaches side by side is how good decisions get made.
Schematic Design is not about finalizing every detail, but to confirm that the overall concept and layout are right before moving forward. Here we are asking bigger questions:
- How spaces relate to one another
- How circulation flows through the house
- Where new rooms or functions should live
- How much of the existing structure can be retained
- What the scope of work actually includes
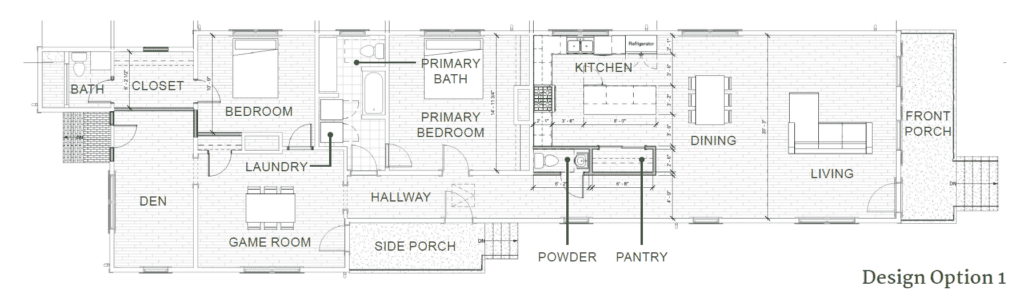
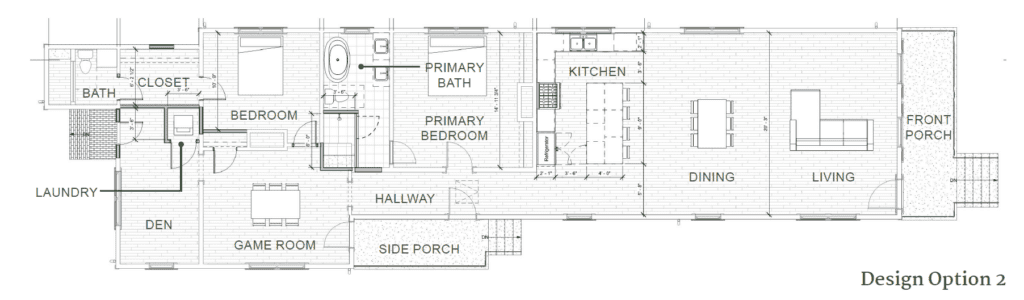
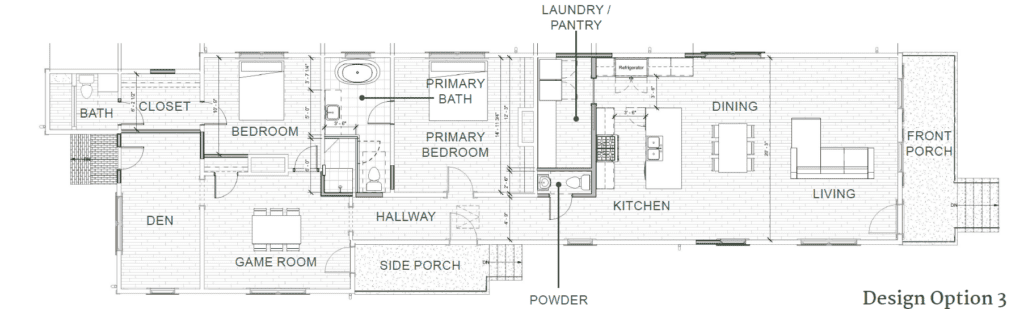
For the Napoleon Avenue project, we presented three floor plan options. The first proposed the most limited intervention, relocating the kitchen toward the front and opening it to the living room while leaving the primary suite untouched. The second expanded the scope to include a redesigned primary bathroom and a new laundry closet. The third built on that and resolved additional needs from the clients’ list, including a proper laundry and pantry room, a symmetrical primary bathroom layout, and a powder room for guests. Option 3 became the preferred direction.
Architect’s Insight: Once the schematic design is approved, we like to bring a contractor into the conversation for preliminary pricing. Early estimates show how the design aligns with your construction budget and allow adjustments to be made before drawings are finalized when changes are still easy and inexpensive.
Phase 3: Design Development
Once a direction is selected, we begin refining it into a cohesive plan.
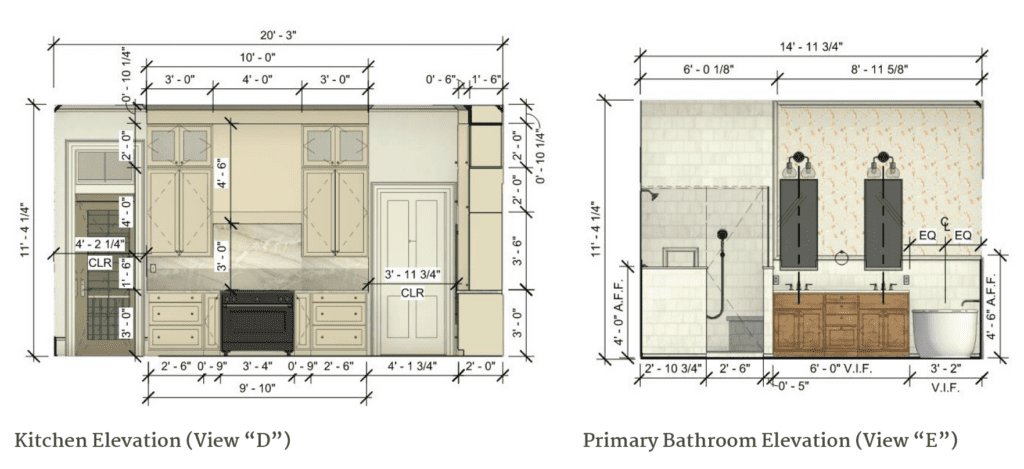
Once the schematic design is approved, we move into Design Development. This is where the project stops being about layout options and starts becoming a real home. We refine the floor plan, develop the exterior design and rooflines, and study proportions, paying attention to how the new work will relate to the existing historic structure. We also begin drafting interior elevations to show how spaces, materials, and built-ins actually come together.
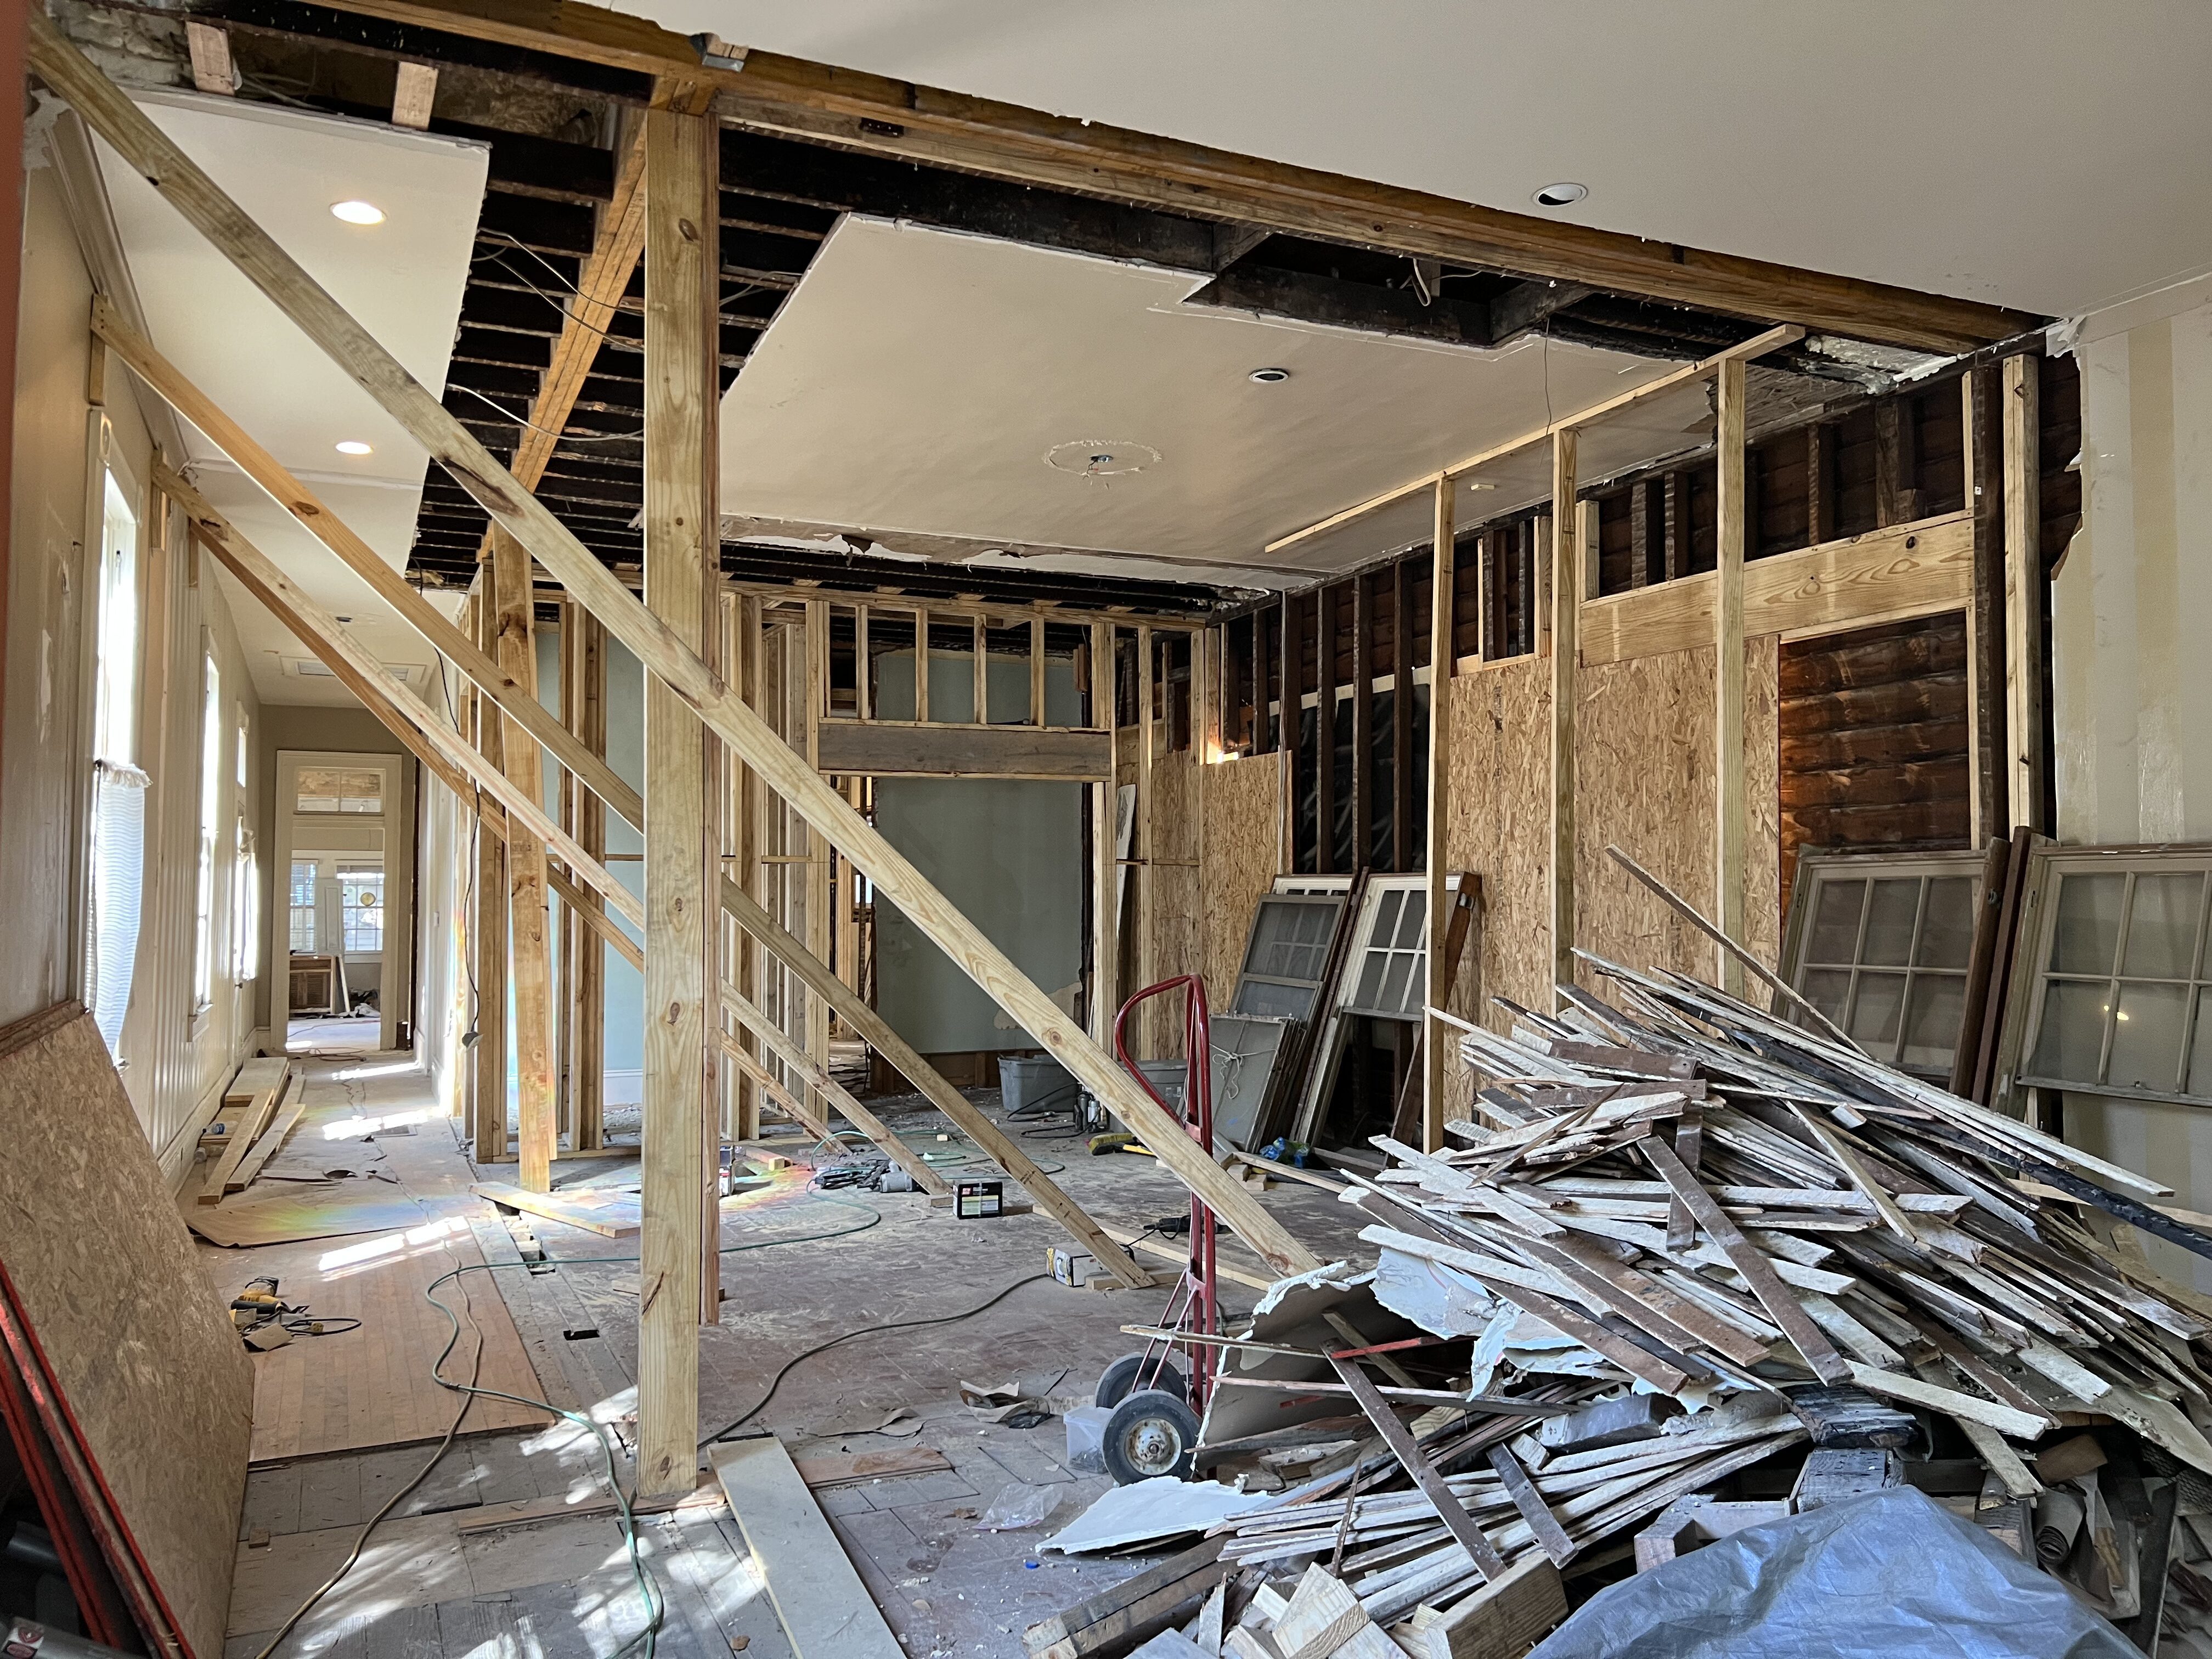
The 3D Revit model does a lot of work in this phase. Renderings give clients a realistic picture of what spaces will look and feel like before a single wall comes down. That is the point: decisions made during Design Development are far less costly to change than decisions made during construction.
For the Napoleon Avenue project, this phase is where the home’s character really started to come through. The exterior was developed to stay compatible with the historic streetscape. The interior elevations began to reflect the clients’ personal style, and for the first time, clients could genuinely picture themselves in the finished house.
Architect’s Insight: Because many historic homes in New Orleans require HDLC review, we often begin coordinating with the Historic District Landmarks Commission during this phase rather than waiting until permitting. Engaging early allows us to address potential concerns within the design itself, which keeps the approval process moving and avoids surprises down the road.
Phase 4: Construction Documents
Construction Documents are the technical backbone of the project.
By this point, the design is set. What the CDs phase does is translate that approved design into a complete set of drawings that can actually be built and permitted, including:
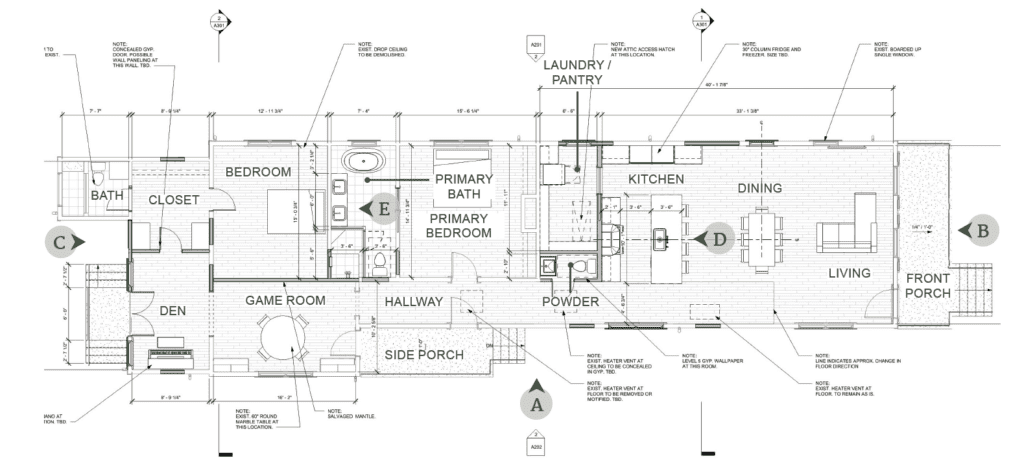
- Dimensioned floor plans and sections
- Exterior and interior elevations
- Structural coordination
- Electrical, mechanical, and plumbing layouts
- Door, window, and finish schedules
- Interior details like casing profiles and tile layouts
For historic renovations, this phase also ensures that materials, profiles, and proportions meet HDLC requirements and remain consistent with the existing character of the building. The CDs are what allow contractors to accurately price the work, and also what gets submitted for your building permit.
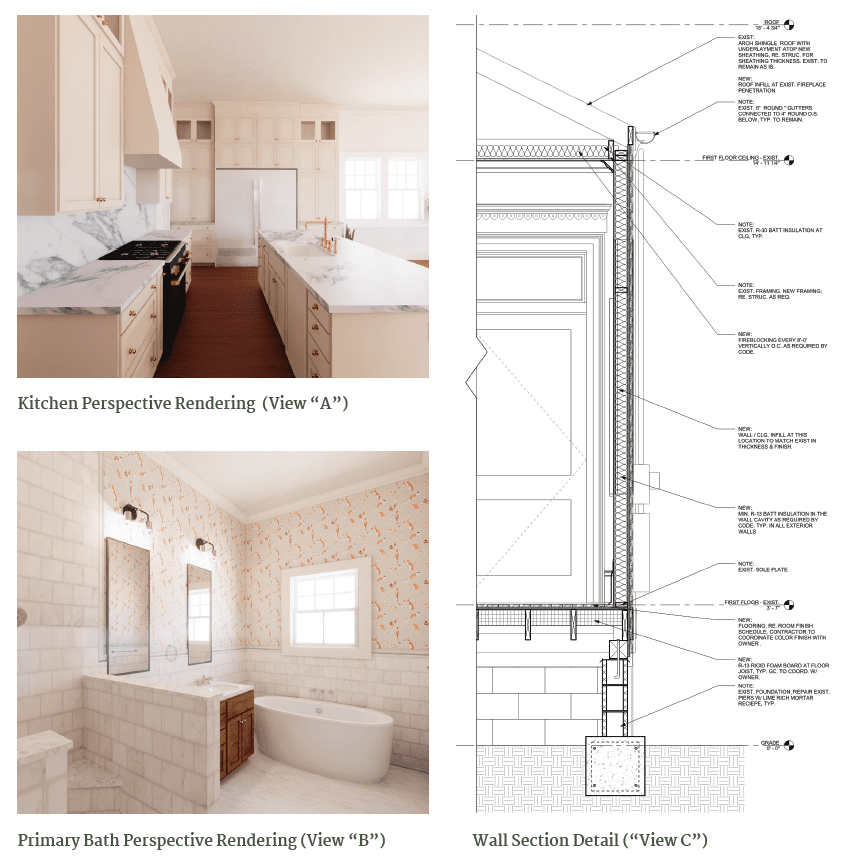
In the Napoleon Avenue case study, the completed drawing set covered everything from wall section details and millwork specifications to finish schedules and window layouts. The renderings produced at this stage closely reflect what the finished home actually looks like, which is the goal.
Phase 5: Permitting, Bidding, and Construction
This is where the project moves from paper to reality.
Once the CDs are complete, the project moves into a different kind of work. The drawings go to the city for a building permit, and to contractors for bidding. Once you receive your bids, we can compile the estimates into a comparison form so you can clearly evaluate scope, cost, and qualifications side by side so you know what questions to ask during contractor interviews and negotiations. The final step is a signed contract, which is submitted to the city to release your permit.


During construction, we stay involved through site visits, responses to field questions, and phased inspections from foundation through punch-out walkthrough. Our job is to make sure what gets built matches what was designed. That matters on every project. On a historic renovation, it is especially important.
Architect’s Insight: Construction Administration is an additional service, but it is one that adds a lot of value to your project. Issues that get caught during a site visit are far less expensive to resolve than issues discovered after walls are closed. Having an architect involved during construction is not about micromanaging a contractor, but protecting your investment in the design.

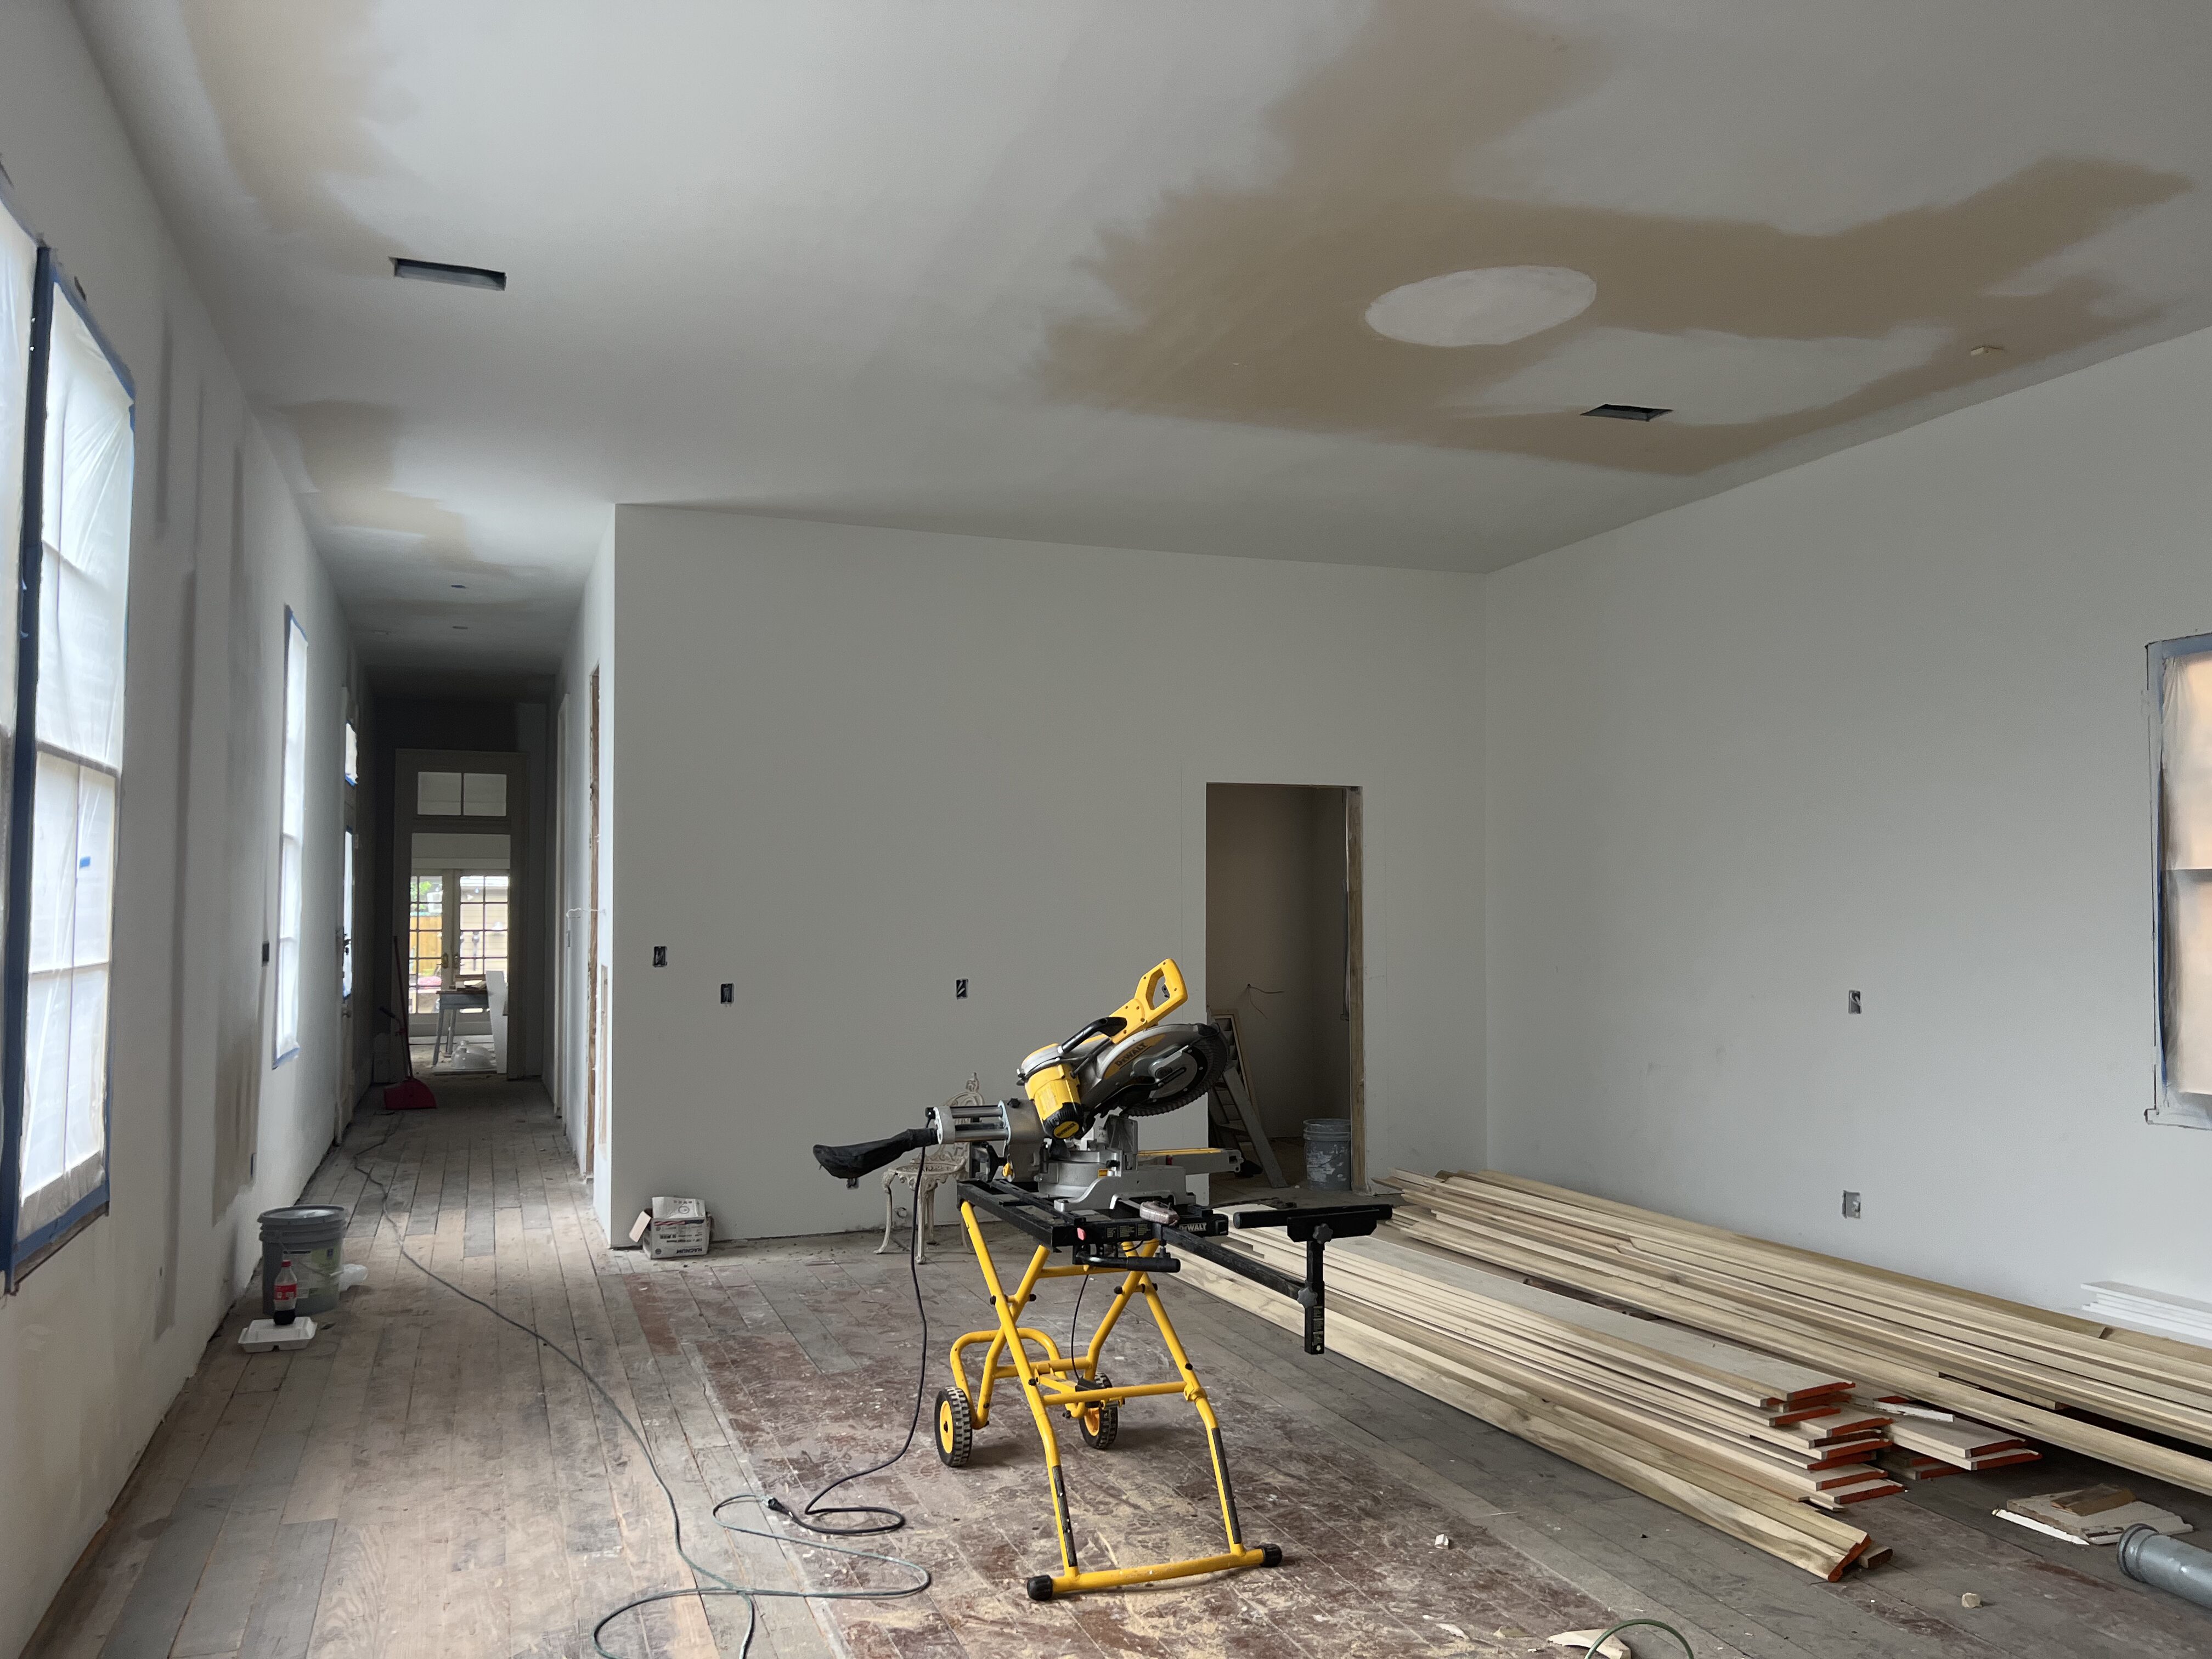
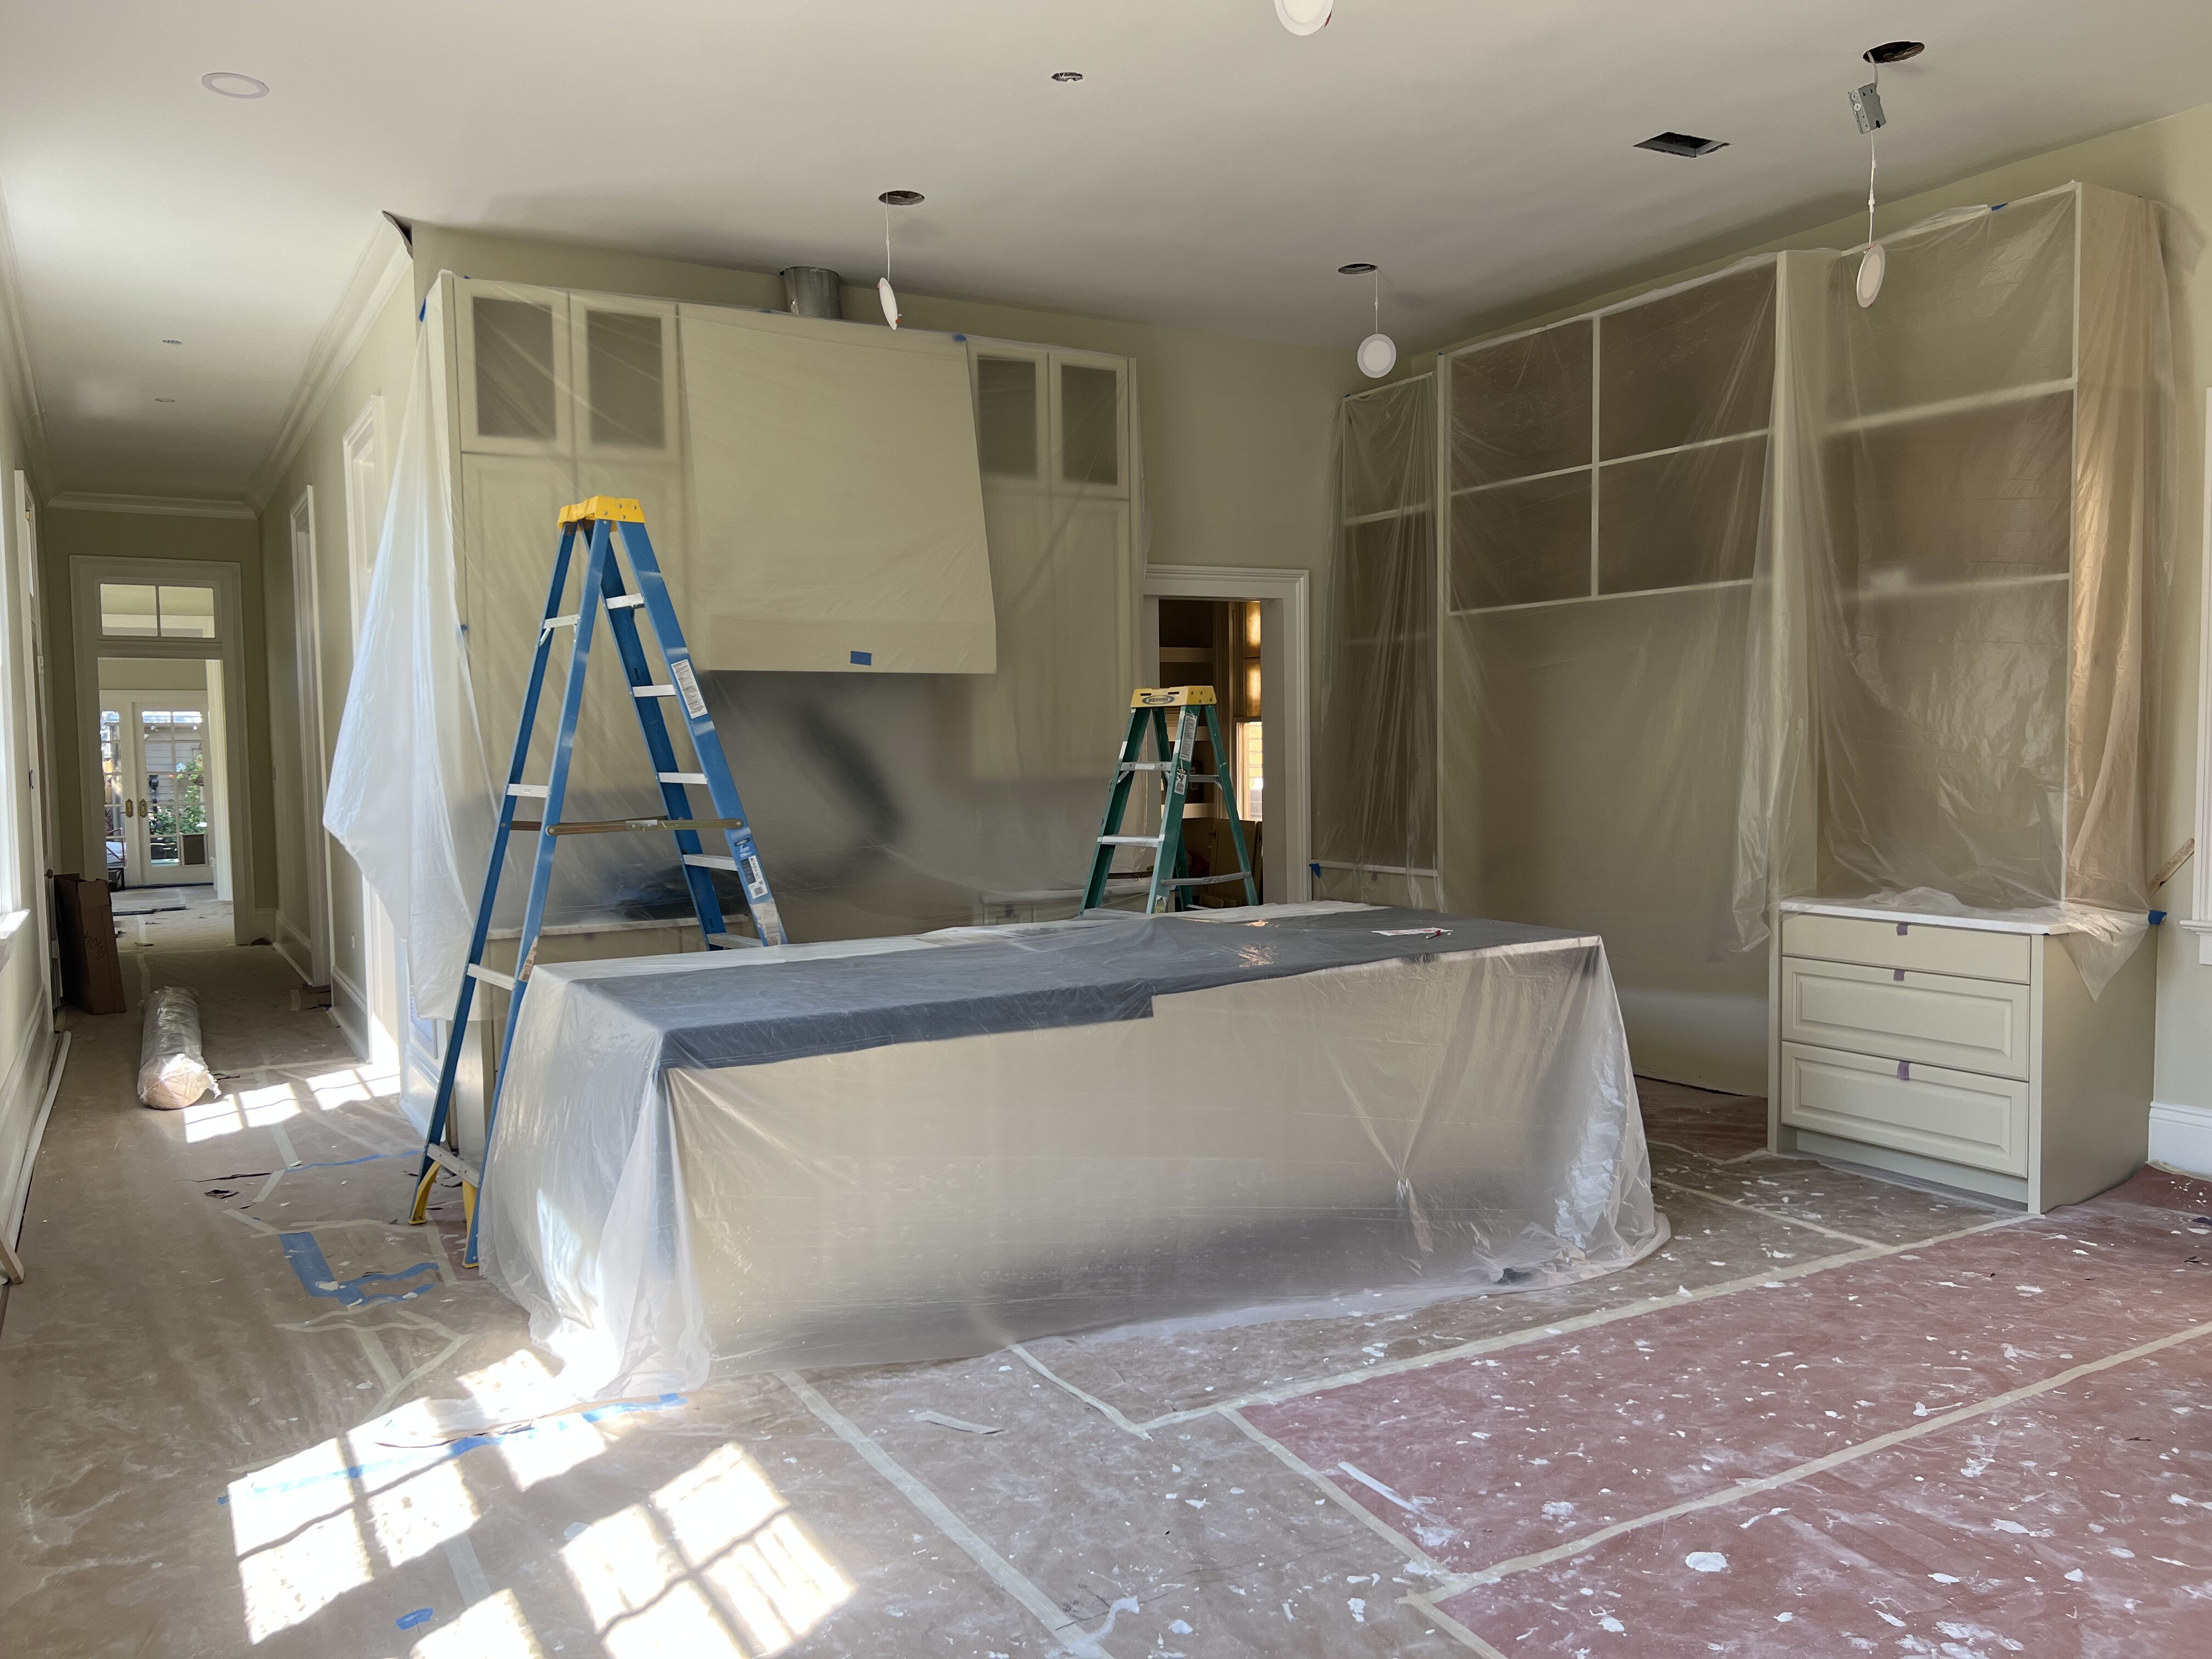
The Finished Product
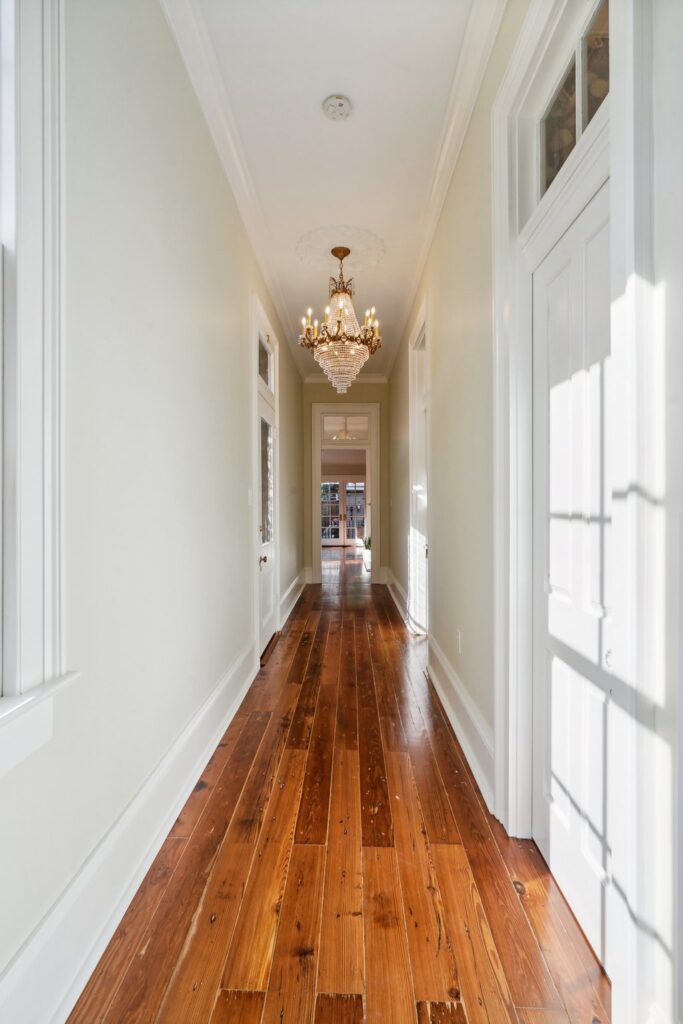
The completed Napoleon Avenue home closely reflects the drawings and renderings developed throughout the design process. Spaces that were once small and isolated now flow together for everyday living and entertaining. The exterior and architectural details remain true to the character of the original sidehall shotgun.
What once felt disconnected now supports how the family actually lives: gathering, cooking, hosting, and moving through the home with ease.
From early field measurements to final finishes, a clear process is what makes a complex renovation manageable. It replaces uncertainty with decisions, and complexity with confidence. That is what we try to give every client we work with.


Thinking About a Historic Renovation of Your Own?
Every project is different, but the process is the same: careful documentation, thoughtful design, collaborative decision-making, and close attention to detail. If you are beginning to think about a project, we would love to talk through what it might look like for your home. Reach out to our team to schedule an initial consultation.
